Boats… Like cars, I seem to go through a few of them. When I moved back to Washington, I went up to my parents’ place in Olympia and pulled out the 1969 13′ Boston Whaler, the boat I grew up with, and started using it for fishing. After getting water over the sides a few times in rough water, I realized that I needed something bigger. I took out my first ever bank loan and bought a 1989 16′ aluminum Valco Bayrunner, with late model Yamaha engines on it.

For variety of reasons, not the least of which was some stupid decisions on the part of the previous owner, this boat was not destined to last long. It cracked open a few years ago while out at sea, and had to be welded back up. While it was laid up, I bought a 19′ fiberglass Bell Boy with a Chevy/Mercruiser I/O drive. I loved this hull; it handled rough water so well, but I wasn’t too crazy about the I/O setup. My decision about this boat was made for me when I struck a submerged rock near A Jetty and tore the outdrive right off the back of the boat. Sigh…

After many months of not being able to find affordable parts to repair the Bell Boy, I put the Valco back in service and sold the Bell Boy. But last summer the Valco started cracking apart again. Aluminum doesn’t hold up too well when it gets stressed repeatedly, and the numerous rough water trips and bar crossings added up to a lot of stress for this thin-gauged, consumer grade hull, running with its maximum rated horsepower.

After the last trip in from the ocean in 2009, when we could hear things cracking and shifting around under the floor, I made a promise to the boat that I would not take her across the bar again. So I was back in the market for another “new” boat again.


New Boat

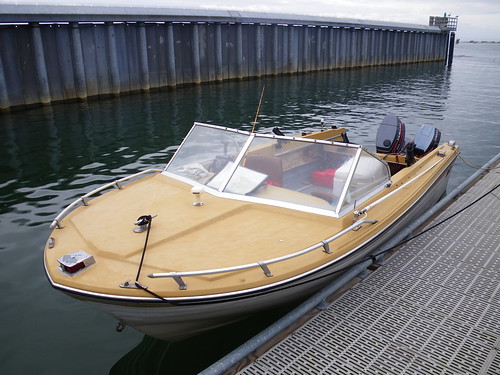
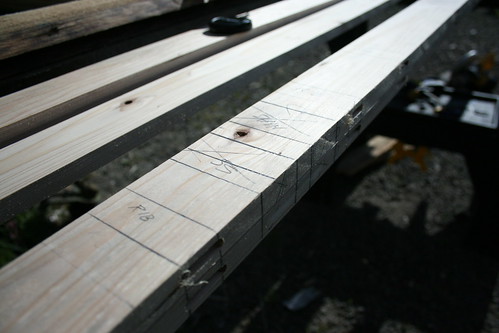
I wanted to be able to do this as cheaply as possible, and I also wanted a hull that could use the Yamaha engines that I already have. I loved the way the old Bell Boy hull had handled rough water, so I started looking around for another one of those. After some searching for a few weeks on Craigslist, I found a 1974 17′ Bell Boy hull, made to take an outboard, on a trailer, for $500, and I drove up to Blaine, WA and hauled it home.


New Boat

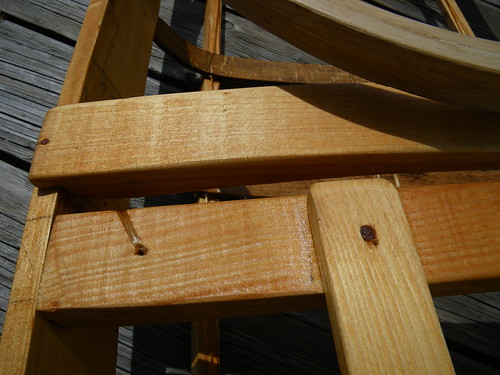
The basic hull was in good shape, but there was a lot of rotten interior and corroded old wiring that needed removing.


Boat Project 1

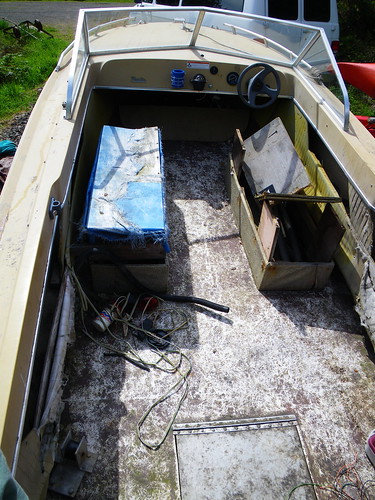
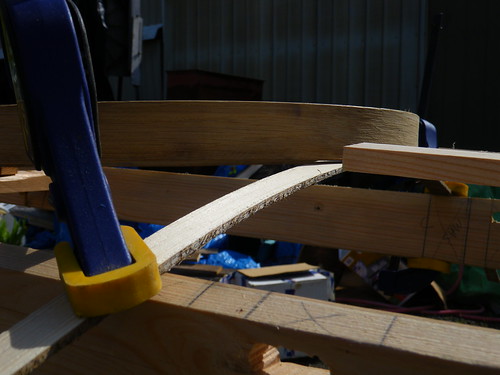
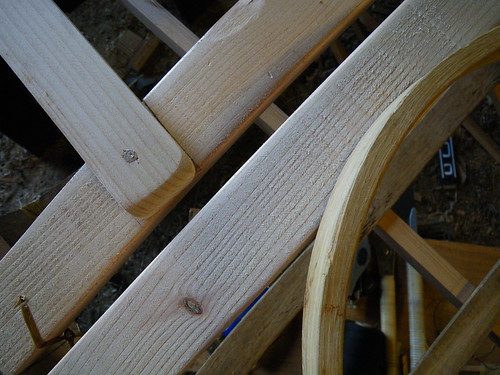
I pulled the rotten plywood seat boxes out and cut out the rotten plywood sideboards off of the inside of the hull, and basically stripped the boat down to a bare hull, windshield and floor.


Boat Project 2

There turned out to be a couple of soft spots in the floor, where water had leaked in through the screw holes that held the seats down, so I cut out the worst spots, filled the holes with polyurethane foam and marine plywood and fiberglassed over the plywood patches. This was the first time I had ever used fiberglass and epoxy, and it wasn’t as bad as I had feared.


Boat Project 3

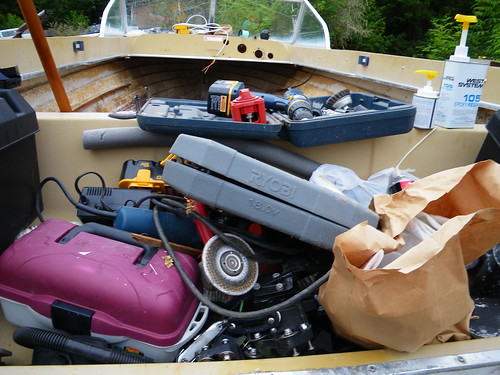
This project went on for way more days, and made way more of a mess of my shop and driveway than I had anticipated.


Boat Project 4

After I had the hull cleaned up, I wire brushed all the loose stuff off, swept up, scrubbed the floor with acetone, and then painted the floor with Kel-Kote textured floor coating. This stuff was thick and stinky and it took over a gallon to cover the floor.


Boat Project 5

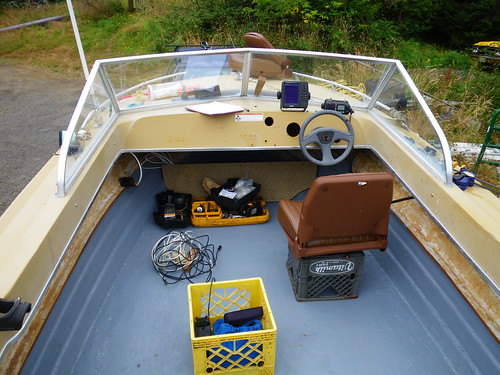
It took a long time to decide where to mount the electronics and to route the new steering cable and yards and yards of expensive marine grade wiring. More than anything else, this project turned into a serious investment in semi-precious metals: stainless steel fasteners and copper wiring.

Luckily, I still had a nearly new ICOM VHF radio and a color Garmin chartplotter/GPS/depth sounder that I had bought for the older Bell Boy. All this stuff had been sitting in the shop on a shelf for years. I did buy a new antenna for the radio, and new seats and steering gear. I was able to use the batteries from the Valco as well as the gas tanks from the Boston Whaler. This boat has a 12 gallon tank built in, but I wanted to pull it out and clean and inspect it before using it. For now, I decided to run the boat off of three 6 gallon plastic tanks. All the pole holders and a fair number of fittings and even some wiring was also salvaged from the old Bell Boy.


Boat Project 6

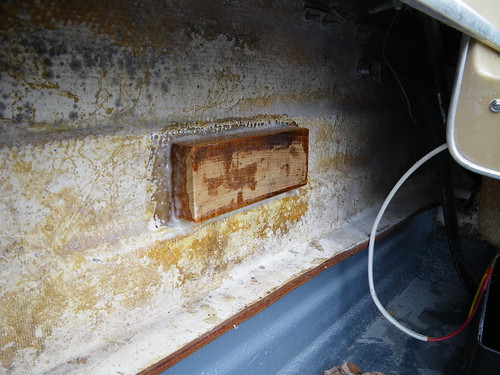
I cut out a piece of black locust to use as a mounting pad for the battery switch and grounding post, and epoxied it to the hull. I also ended up doing the same thing for mounting bilge pumps to the hull.


Boat Project 7

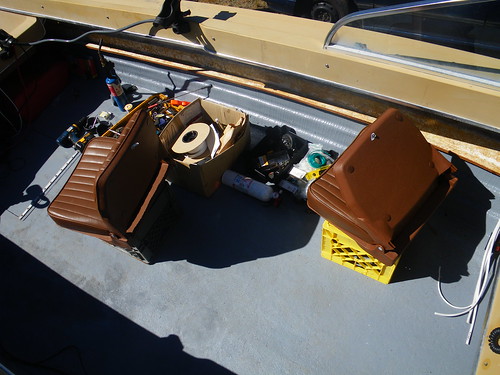
What to do about seats was another sticky problem. I ended up going with just two seats for now, since I rarely have more than one other person on board anyway. It left a lot of nice floor space which I’ve already been glad to have. I built a couple of quick plywood boxes to mount the seats on, and painted them with marine paint, which is still pretty smelly, over a month later.


Boat Project 8

Decisions about wiring and the associated connectors and wiring harness mounts took up an amazing number of hours, but in the end, I ended up with a pretty clean electrical setup all the way around. I did an awful lot of soldering…


Boat Project 9

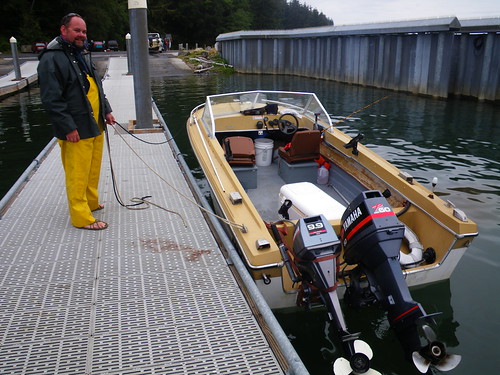
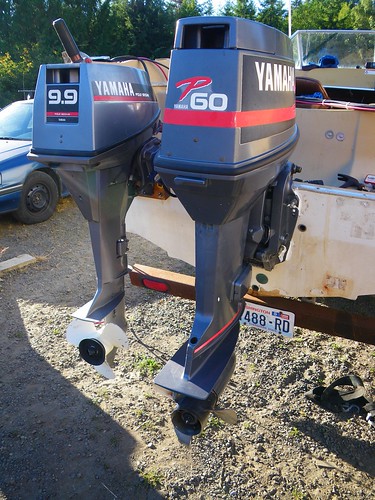
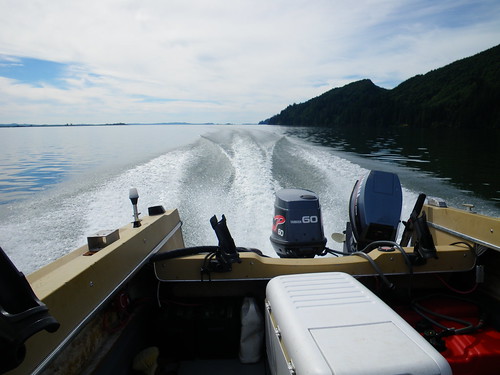
Finally I was ready to mount the engines. This also took a lot more time than I expected, since I had to be very careful about where the kicker went, so that it would clear the transom well when steering. I ended up making a big spacer block/mount out of 2″ thick black locust for this. This is also the point where I realized that the transom near where previous kickers had been mounted had gotten some water inside. Eventually, this transom should probably get replaced, but I figure I should get at least three or four years of use before I need to undertake that project.


Boat Project 10

I finally got to put the boat in the water in late August, and everything worked as expected, on the first try!


coming home from Brookfield

There are still some things to fine tune, that’s for sure. For one thing, this boat tends to point away from the wind, and if you have to get up and go to the stern to do something like fiddle with the trolling motor, it leecocks even faster than normal. So I need a separate remote control for the kicker. And I think I will mount a fuel tank in the bow, too, to help with weight distribution and trim. It’s also a bit of a trick to carry out anchoring procedures with a closed bow. I did finally figure out a pretty clean way to do this, but it took some practice. And the trailer that this boat came on is something of an abomination. It has coil springs, and it sways back and forth and bounces around a lot. Also, the previous owner shortened the tongue to get rid of a bent part, throwing off the tongue weight and balance. So whenever I tow it, I have to disconnect the gas tanks and move them and the cooler full of ice as far forward as possible to keep the trailer from acting weird. A new trailer is in order at some point.

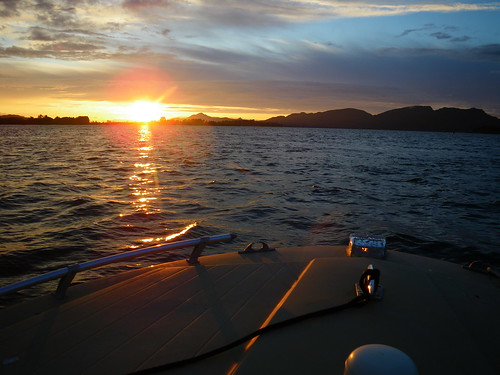
Overall, though, I’m pretty pleased with what I got. It’s comfortable, deep and stable and having a windshield to hide behind from spray and wind is pretty nice!


sunset

After a few trials and a tribulation or two, Alice’s kayak is finally finished.


finished qajaq

When I last posted, I had a finished and oiled frame. I still had a piece of fabric left from when I ordered materials for my last kayak a couple of years ago. I dug out the fabric, bought a couple of rolls of dental floss and set up the kayak frame at the paddle center one night, and proceeded to sew the skin on.


interior view

The zig zag stitch on the inside of the skin tightens the skin considerably and I went through this stitch several times, taking out more slack each time. Finally, I decided, wrongly as it turned out, that the skin was fully tightened and I stitched up the center seam. After such adventures with the woodworking part, it was sad to see the frame get all covered up in bright white fabric…

A couple of days later, I mixed up some acid based dye powder in some vinegar and water, and dyed the fabric what I was thinking would be a grayish brown. And the skin suddenly sagged and loosened…. a LOT. I went to the paddle center to get the iron, but when I got back the sun and the wind had dried the fabric somewhat and it tightened up again. I used the heat gun on some of the worst of the wrinkles left behind, and went to bed, planning to take it to Brian’s shop the next day to put the polyurethane on.

In the morning, it had loosened again, even worse than the first time, but I thought it still might be salvageable if I could shrink it back up again. So I loaded it up and headed down to Brian’s to put the coating on, a part that I didn’t enjoy much the last time I built a kayak. I also didn’t remember the details very well either, and wanted to put it on where Brian was handy to yell at me if I did something boneheaded.

I coated the skin, but it was so loose by now as to make it impossible to get a decent finish on, or to get the excess off. By now, I knew I was going to be reskinning this boat at some point. I thought about it overnight, and the next morning went back to Brian’s, begged a new and different fabric off of him and came home to cut off the newly installed skin.


sewing up skin

Eight hours later, I had the new skin sewed on, with the coaming installed and fabric dyed and drying. This fabric was much nicer to work with; I was able to keep the skin almost perfectly wrinkle free, and it stayed that way.


ready to coat

It took a couple of hours to put the coating on the bottom of the hull. The next morning, I found that the edge had dripped a little in spite of having masked it off with tape, and there was a little haze in the coating, telling me that I left it on a little thick. I shaved off the worst bubbles with a razor and then coated the deck. I did this out in the sun and wind, and it dried pretty quickly, although I did catch a number of mosquitoes and other bugs.


finished qajaq

As soon as it was dry enough to handle, I put the deck lines and fittings on. The toggle and beads are caribou antler, that I purchased in the silent auction at SSTIKS a few years ago.

I have a set of brand new float bags for it, and a Snapdragon spray skirt to fit as well. It’s finished!


qajaq


finished qajaq


frame

I have been making noises for a while now about building a Greenland style qajaq to fit my daughter Alice. She has paddled my Romany, but that is a big clunky boat on her. SSTIKS is coming up soon, and one of the best ways I have to motivate myself to finish projects like this is to have a deadline. With that in mind, and a chance to put the final coat of polyurethane goop on the skin at Brian’s shop on Friday, under his expert gaze, I set aside this week to devote it almost entirely to building Alice’s qajaq. As of tonight, I have about 50 hours into this project, with another day and a half or so to skin and coat it, and it will be done in plenty of time to go to SSTIKS.


frame

I kept thinking I would break this process apart into several blog entries, but each night, when I stumbled into the house at 10:30 or later, ready for a beer and bed, blogging was never what was on my mind at that point. Now, I have the frame finished, and the time set aside to finish the rest, so I can take a little break and post some photos and comments.


frame

I did not set out in this case to replicate any particular qajaq. What I wanted was to build a qajaq that would end up about 15 feet long, 18 or 19 inches wide, and snug enough to be a good fit, Greenland style, on a 15 year old girl. I had a stack of books that helped me through this process; I mainly use Robert Morris and HC Peterson’s books for construction technique, and Harvey Golden’s masterpiece, “Kayaks of Greenland” as my guide to design and details.

I wanted to make a qajaq that fell generally within “Type V” or “Type VI” parameters, as described by Harvey. I ended up deciding to follow the Type VI description more specifically.

What I ended up with, for you qajaq nerds out there, is 14′ 9″ LOA, 19 1/4″ wide at the masik, and 5 3/4″ deep from the top of the keel to the underside of the masik. It should be a good fit on Alice, and might even turn out to be a decent “cheater” rolling boat for someone a little larger.


shaping the frame

I learned a few important lessons this week, as I always do with projects like this. One thing I did not realize when I started this project is that I had sold off all of my perfectly clear, matched sets of gunwale quality lumber. I did a lot of scrounging through the woodshed trying to find a pair of good sticks for the gunwales, and in the end, I came up with one pretty bendy quartersawn piece, and a much stiffer flatsawn piece. I knew that this would be challenging to make a good frame out of, but I didn’t quite realize just how challenging it would be. The first night after I got the lumber picked out and sawn to size, I even left a heavy brake drum hanging off of the stiff piece suspended between two sawhorses, hoping that would help. It didn’t do much, and it ended up taking a lot of careful lashing, shims and clamp ties to wrestle these two divergent pieces of wood into a mostly symmetrical frame. I ended up having troubles with my homemade mortising jig for the router, too, and buggered up a couple of my mortises, which also gave me headaches later.


shaping the frame

I eventually prevailed, though, and after I got the gunwales and deck beams bent and pinned into their basic shape, it was time to set up the masik, which is the piece that supports the front end of the coaming. In addition to the masik, I added another deck beam, the seeqqortarfiupo. This one supports the aft ends of the forward deck stringers, and provides a snugger fit on the thighs, which seems to make for easier rolling. I used clamps and battens, and a few hours of fiddling around to set up these important deck beams. I hope I got them right!


masik and coaming

One of the other problems I had was also related to the wood I had on hand, ironically, since I own a sawmill, and have no excuse… but the white oak I had to make bending stock for ribs out of was a little too dry, and had a lot of grain runout that did not make things too easy when it came to bending ribs. My first run at steam bending the ribs resulted in a pile of broken and almost broken pieces. I patched up the better ones with lashings, but the next morning I came out and tried again. The steamer seemed to get hotter that time, and I had much better luck.


broken ribs

When the qajaq gets exceptionally shallow, it helps the ribs fit easier, with less breakage, if you notch out the inboard side of the mortise. I wish I had done this sooner, and on more of the mortises, but better late than never.


rib joint

I fussed around with the chines quite a bit, too. If I put them too far apart, the boat would have tons of primary stability, but no secondary stability, and would be harder to balance brace and roll. But if I put them too close together, the boat could turn out to be uncomfortably tippy. I also used a string across the chines and keel to make sure that the skin wouldn’t touch any ribs, something I wish I had done on my last kayak project.


sheer line

One of things I love about building kayaks is that you don’t need a ton of space, or a lot of expensive tools. And you don’t need to be talented at furniture grade joinery either. This stuff, plus a drill, router and a couple of small shop power saws and a planer were all that I used. There is no metal in this craft either; the frame is held together with joinery, lashing with artificial sinew and seine twine, and pegs.


tools


lashed joinery

I finally got the frame nearly finished late last night. I was working away and caught myself brushing mosquitos off my arms with a sharp chisel in the brushing hand, and I realized it was time to quit. When I got in the house, I realized it was a quarter to midnight, and I had been at it since 1 PM. Once I got the frame mostly completed, I oiled it.

Nothing brings me the same kind of sensory joy that heating up a nice fragrant batch of “boat sauce” does. This is made from linseed oil, pine tar (you probably won’t find that at Home Depot!), turpentine and Japan dryer. I warm it up in a can on the propane burner in the shop and brush it on hot. Hours later I will come back and rub the frame down with a rag, and today I got to set it up in the sun and wind to finish drying.

All that remains now is to put the skin on and rig up the deck lines, and it will be ready to paddle. More later, when that part is done! For more photos of the construction process, you can check out my flickr set here.


masik